I want to use this post to talk a little bit about problem solving in visual effects. The reason this job is so hard (and so fun) is that every production is a different animal and presents its own set of problems. The solutions are almost never straight-forward, which is why having a team that knows how to use its tools in creative ways is so important.
In my last post (which you’ll want to go ahead and read if you want this one to make any sense), I asked if you could find the problem with the following shot

Here’s a close up of the issue:

Yikes! His hand seems to glow. Do you remember those pink tracking markers from my last post? This glow is actually caused by light reflecting off of those markers, but now that we have hidden them behind our tracked screen, this reflection has no place in our shot. This is actually a pretty common phenomenon, especially when shooting something on a green screen, called spill.
In most cases, spill is a simple enough thing to solve, but since our markers were pink, we actually have a tricky spot here. The problem is that a computer sees our actor’s skin as being a very similar color to the spill color, so any adjustments we make to the spill color changes our actor’s complexion into something out of “Night of the Living Dead”

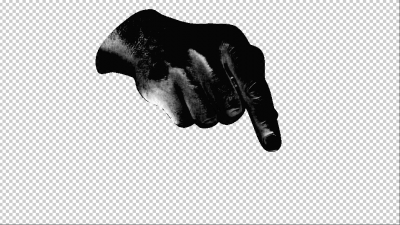
Look at the difference between his arm near the sleeve (where we haven’t applied a color correction) and his hand! The solution to this problem turned out to be the intensity of the pink glow compared to the rest of his hand. We used advanced post production software to isolate the parts of the image where that color was the most intense. That gives us a crazy image that looks something like this:

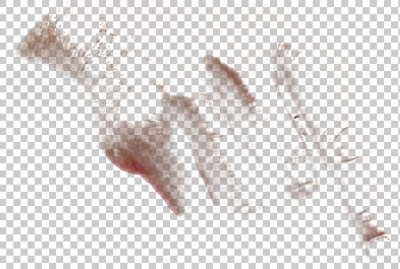
Ok, I have to admit that looks really strange, but we’re going to use it to color correct the problem areas of the shot and leave the rest of our shot intact. In the above image, the white areas of the frame are the pinkest, while the black areas have almost no pink in them at all. If you think about a plastic surgeon drawing on a patient’s face with a marker, you’ll have a rough estimation of what this image is for. It is a special kind of map, called a matte, that shows us what is good (black) and what needs to be corrected (white).
The trick here is making a duplicate of our hand (which we’ve already cut out in the earlier blog post) so that we have two identical images sitting directly on top of each other. One of these hands is going to stay the same, the other we are going to use to create digital make-up that we can apply to our problem areas.
We’re going to use our matte to tell us where to apply the make-up. We tell the computer that we want our make-up layer to only be visible in the places where the matte is white. This will erase the parts of our image where there is no pink spill:

Now to adjust the color of our makeup. Since we aren’t changing the whole hand anymore, we can use the traditional method (the one that made our actor’s arm look like the undead) as a base coat.
Remember that duplicate hand, the one we left alone? All we have to do is put our makeup onto our hand, and we have an image where the spill is color corrected and the rest of the arm looks normal!
A complicated solution to a simple problem? Maybe, but individually tailored solutions are the norm in visual effects. That’s why we always recommend working with professionals have integrated post production into their workflow. It’s not uncommon to see people trying to use out of the box solutions, presets, and stock photography/video to solve problems that really require individual attention.
I’m thrilled to be a part of a team at the dvi group that looks at solving problems as one of the benefits of the job rather than as a hassle. For me, finding the answer to a tricky visual effect problem is like putting the last piece into a puzzle, and that’s not nearly as satisfying if you are shoving them together in ways they obviously don’t fit.

